Overview
User groups make it simpler for larger organizations to give the right people access to content they need to do their work. Instead of adding users one by one and adjusting the permissions for each, you can create a user group, add the necessary people to it, then add the group to the folders where they need access and assign the access rights only one time to the group as a whole. Lastly, you can have as many User Groups as your organization needs.
Create a User Group
The User and Groups screen allows Administrators and User Managers to manage members and guests and only they can create User Groups.
To create a User Group:
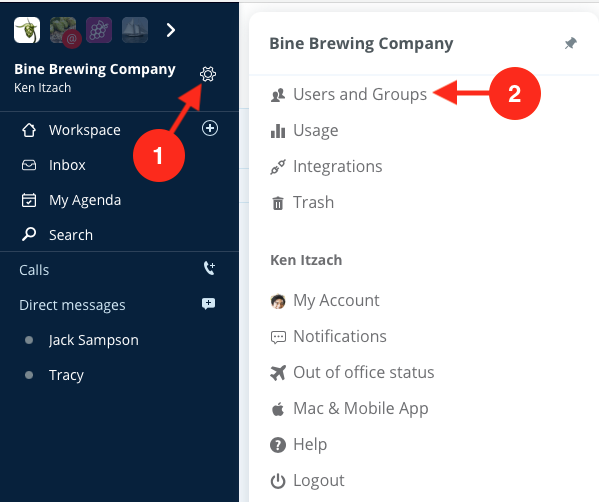
- Click on the gear icon next to the organization name
- Click Users and Groups
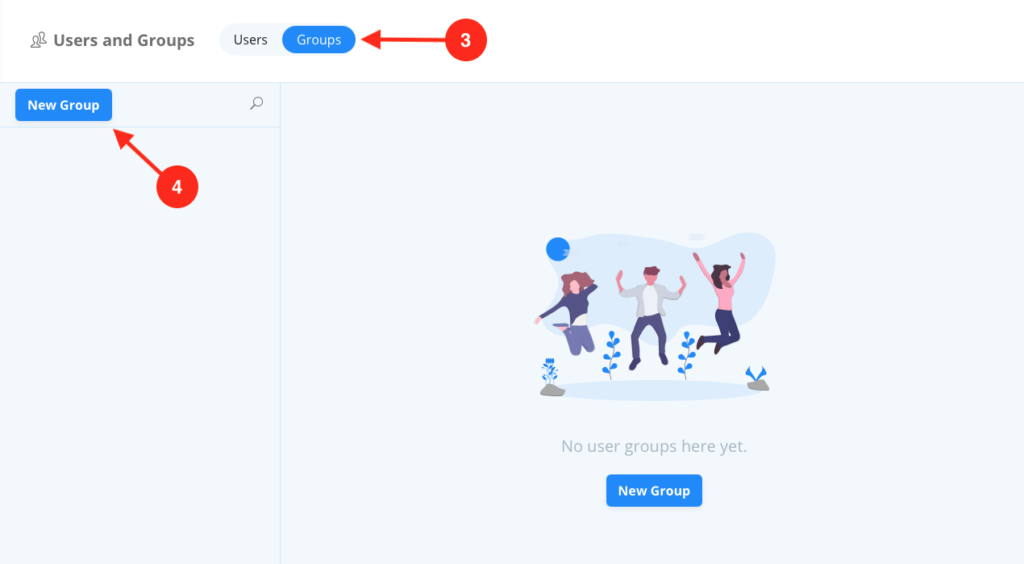
- Click on the Groups tab
- Click on New Group
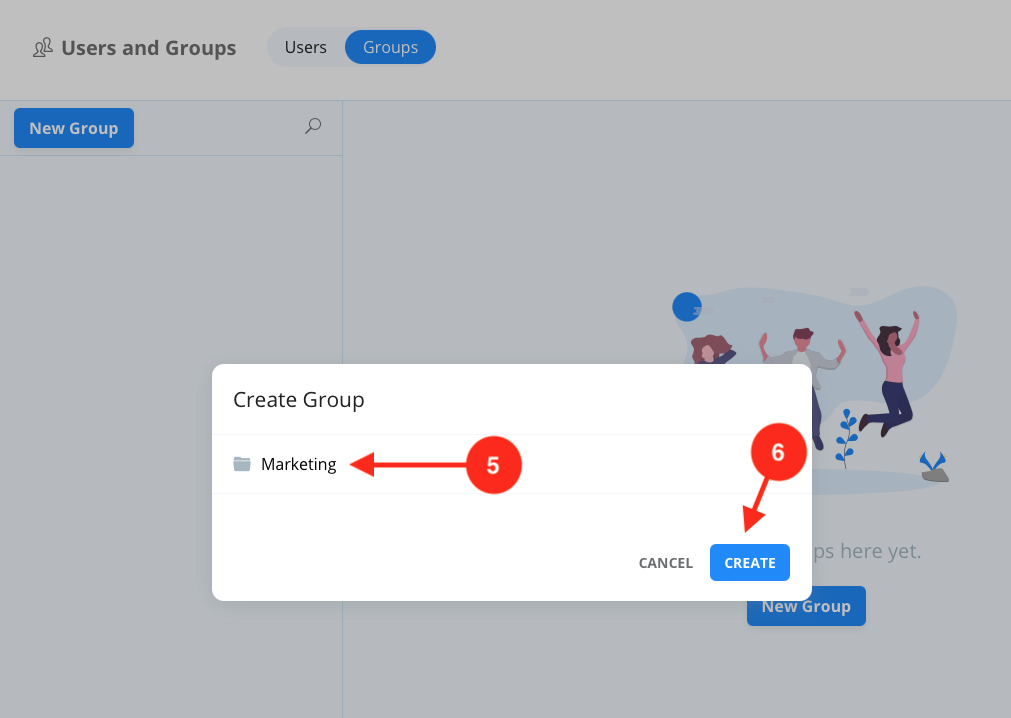
- Give the new group a name
- Click Create
- On the new group screen click to Add Members
Add User to existing User Group
After the User Group is created you can always add new members to an existing group.
To add member to existing User Group:
- Navigate to Users and Groups —> Groups tab
- Navigate to the existing Group
- Click Add Members
- Locate the member in the list and click to add them to the Group
Remove User from existing User Group
After the User Group is created you can always remove members from an existing group.
To remove member from existing User Group:
- Navigate to Users and Groups —> Groups tab
- Navigate to the existing Group
- Locate the member in the list
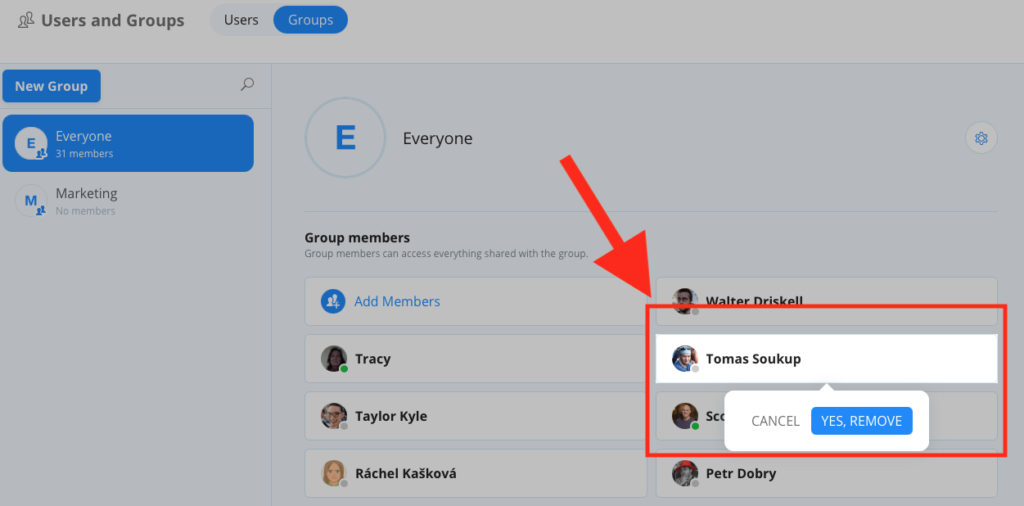
- Hover over the member and click the X to remove them from the Group
- Click Yes, Remove
Add Avatar to User Group
After the User Group is created you can upload an avatar to represent the User Group.
To add avatar to User Group:
- Navigate to Users and Groups —> Groups tab
- Navigate to the existing Group
- Hover over the current avatar and click on the pencil icon —> Upload
- Browse your computer for the avatar image and click Choose for Upload
Remove Avatar from User Group
You can remove an avatar that represents a User Group at any time. You can remove it and return to the system default, or you can replace it with a different avatar.
To remove avatar from User Group:
- Navigate to Users and Groups —> Groups tab
- Navigate to the existing Group
- Hover over the current avatar and click on the pencil icon —> Remove
Rename User Group
After the User Group is created you can rename the User Group.
To rename User Group:
- Navigate to Users and Groups —> Groups tab
- Navigate to the existing Group
- Click the gear icon in the upper right corner of the group screen
- Click Rename
- The name field in the group screen will become editable and you can type the new name for the existing User Group
Delete User Group
After the User Group is created you can delete the User Group.
To delete User Group:
- Navigate to Users and Groups —> Groups tab
- Navigate to the existing Group
- Click the gear icon in the upper right corner of the group screen
- Click Delete
- In the confirmation dialog transfer the access rights of the group to a member
- Click Remove


