Overview
Our customer support team may ask you to generate a HAR file when trying to troubleshoot complex issues. You can generate the HAR file in Google Chrome or in the desktop app.
HAR (stands for HTTP Archive) contains information of web requests taking place in the browser. Providing HAR files enables us to analyze potential performance and rendering issues.
Generating a HAR File from Google Chrome
1. Open Google Chrome, login, and then go to the content where you are experiencing issues.
2. Click View –> Developer –> Developer Tools.
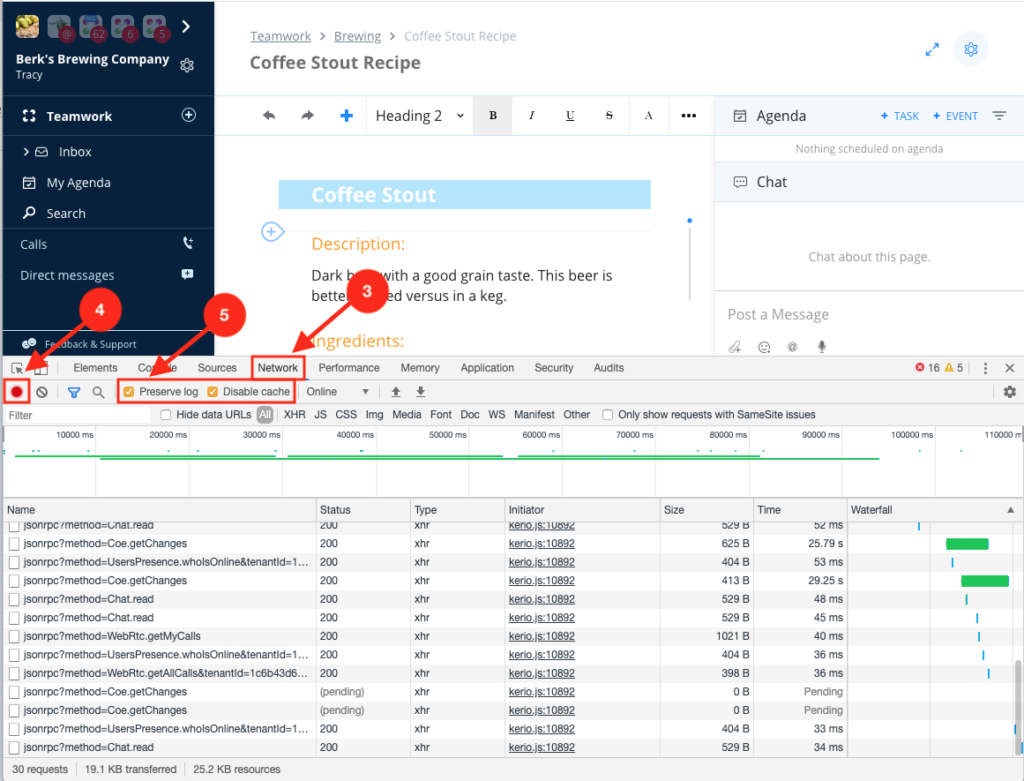
3. Select the Network tab.
4. Confirm there is a red ‘recording’ circle (if you see a gray circle, click it to start recording).
5. Mark the following boxes:
- Preserve log
- Disable cache
6. Reproduce the issue that you were experiencing.
7. Switch to “Console” tab and search for red text.
8. Switch to “Network” tab and search for red text.
9. Take screenshots of what you are seeing and the red text.
10. After the issue is captured go to the network tab and right-click anywhere in the log. From the context menu select Save as HAR with Content, and save the file to your computer.
11. Submit the HAR file to the customer support team member.
Generating a HAR File from desktop app
1. Open the desktop app, login, and then go to the content where you are experiencing issues.
2. Locate the About dialog and keep clicking on the Samepage logo until it reveals “Open Dev Tools” option.
- For Windows: the about dialog can be found by navigating to the bottom taskbar, click the ^ icon to open hidden icons, right click on the Samepage icon, and click About
- For Mac: the about dialog can be found by navigating to the menu bar, click on Samepage next to the Apple icon, click About Samepage
Once the developer tools are open you can follow the steps above, starting with step 3.


