Overview
All users can connect third-party apps to Samepage through our Zapier integration. When you connect an app to Samepage, you can automate updates to content and Folders in your organization. With Zapier Integration you can have the “Zap”:
- Create an Event
- Create a Task
- Post a chat message
- Create a Discussion document
- Create a Folder
- Create a Page document
Something to know before you start:
Connecting apps in Zapier is called “making a Zap.” It involves two components: a Trigger to start and an Action to perform. For example, if you want to be notified of new survey responses, SurveyMonkey is the trigger app and Samepage is the action app.
Currently, you can only select Samepage as an action app.
Connecting Apps to Samepage
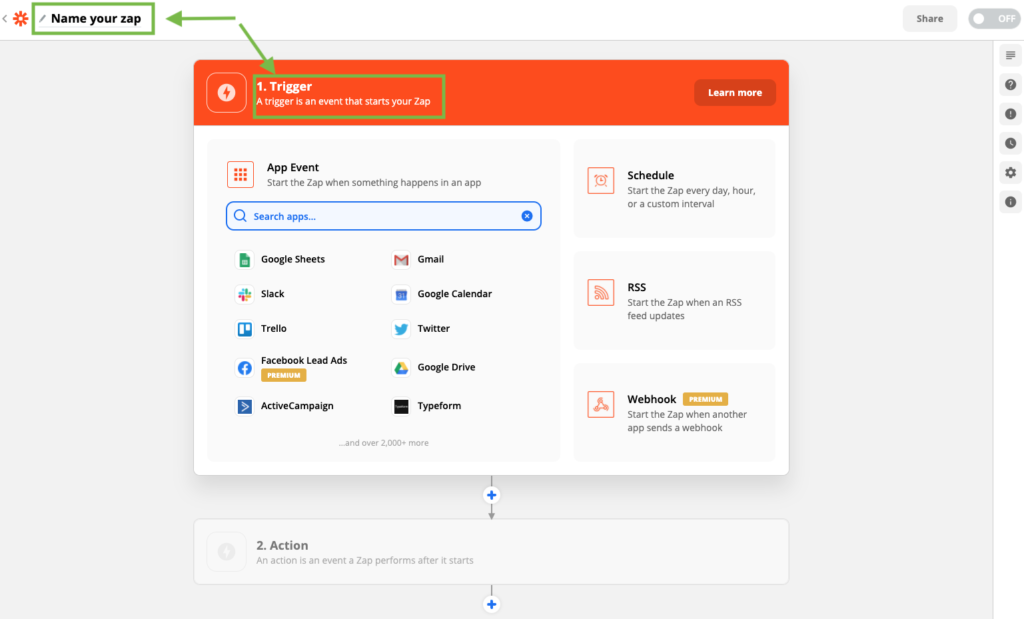
1. Select “Make a Zap” or “Make a New Zap”
2. Name your Zap
3. Set up the trigger by following the prompts in Zapier. Choosing a trigger app depends on what you’d like to get notified about in Samepage. For example, you want a page created in a folder when you receive a new email. Receiving the new email would be the trigger.
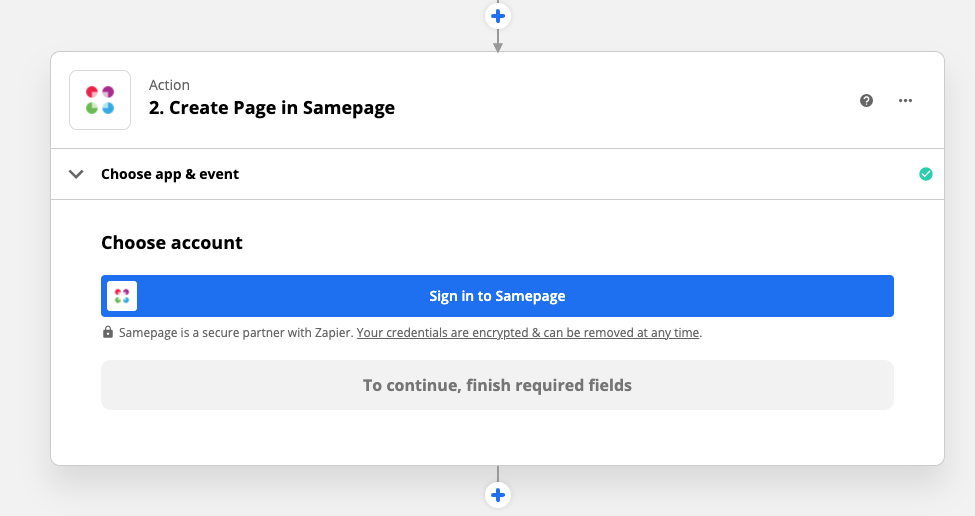
4. Set up the Action and start by choosing Samepage as the action app.
5. You will be prompted to sign in to your Samepage organization.
6. You’ll see a pop-message to log in to Samepage. Confirm that yes, it’s you.
7. If you belong to more than one organization, select the organization you want to connect.
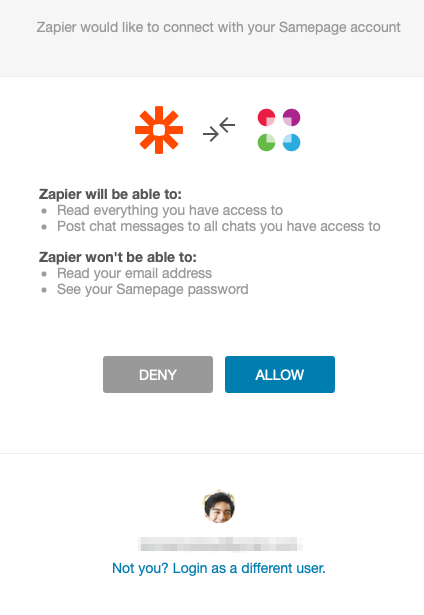
8. Allow Zapier to connect with your Samepage account.
9. Once you are connected to Samepage and Zapier has access move on to finish setting up the Action.
10. Follow the prompts in Zapier to set up the action. Choosing an action depends on what you’d like to happen in Samepage when the trigger is activated. For example, you want a page created in a folder when you receive a new email. Creating the page in a folder is the action.
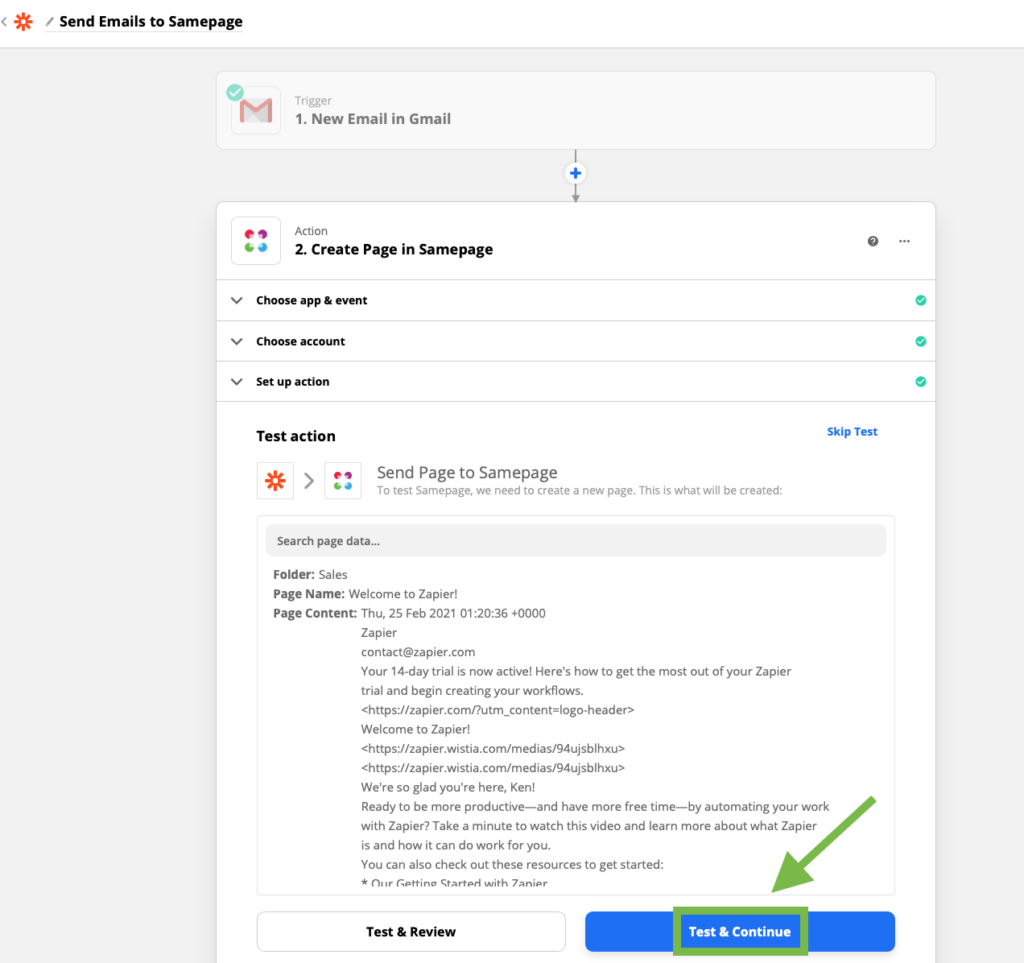
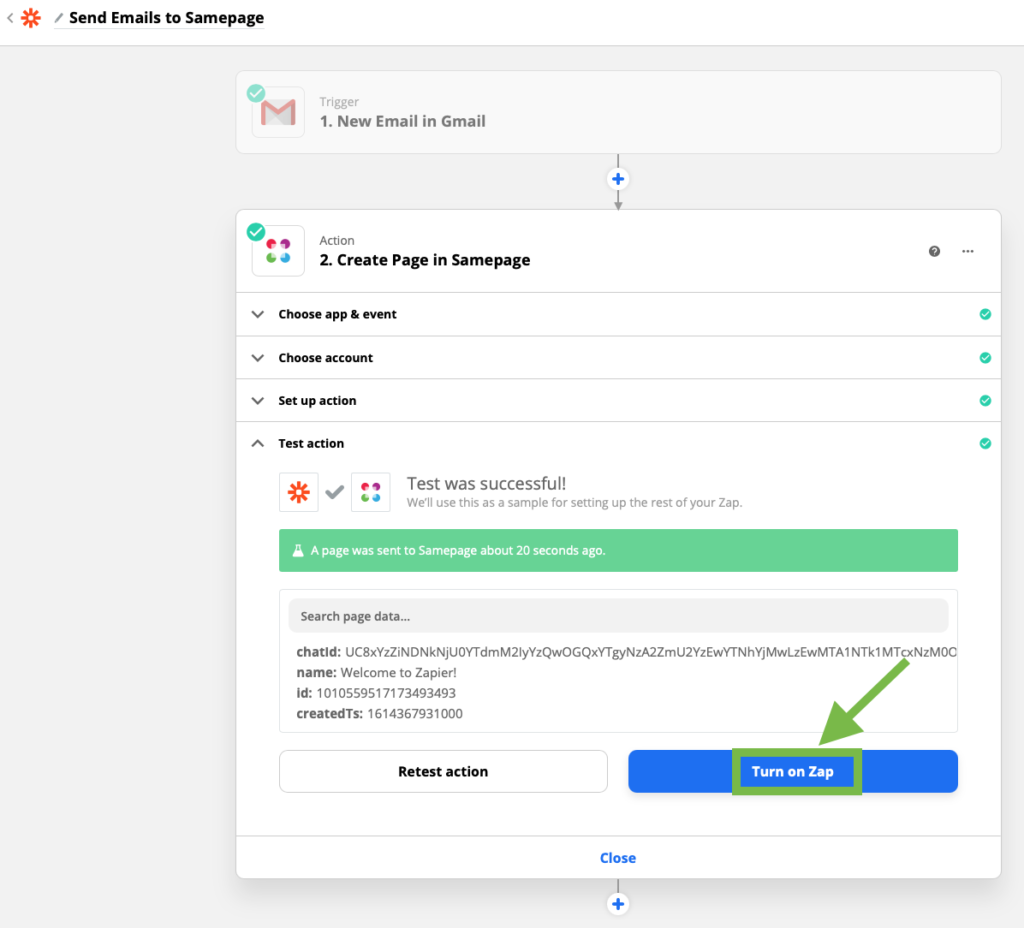
11. Once the action is created there’s an optional but recommended step: Select “Test” to make sure your account is connected. If it’s a success, you’ve connected your Samepage account! You can now start connecting other apps to Samepage.
12. The last step is to turn your Zap on. Your organization will start receiving automatic updates of events right in Samepage!
Disabling a Zap
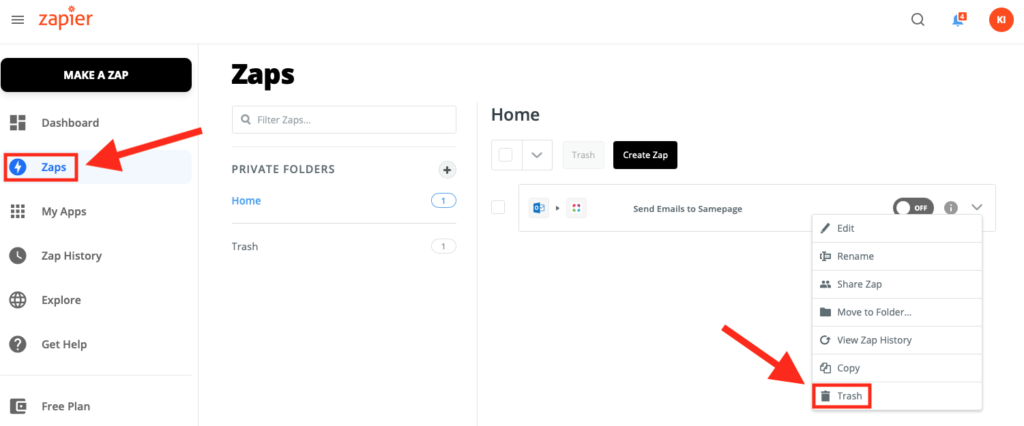
1. In Zapier, go to your dashboard (click on Zaps).
2. Go to the Zap you want to disable, then switch to “off.”
Deleting a Zap
1. In Zapier, go to your dashboard (click on Zaps).
2. Go to the Zap you want to delete, make sure it’s turned off, then click the drop-down menu.
3. Click “Delete,” then click “Really move to trash?”


